Hi there, I hope you are safe and doing great. Are you stuck at home and can’t visit a salon? Do you want to know how you can do a natural facial from the comfort of your home?
In a hurry? Get the Natural facial log with sample facial options right in your mailbox!
Why do a natural facial at home?
Who doesn’t love to go to a salon and pamper with a good, facial? But, sometimes life happens and it may not be possible to go to a salon for a routine visit. Result? Dull, tired skin. Revie and rejuvenate your skin with this easy peasy tutorial on how to do natural facial at home.
I have created this in-depth guide on how you can do a facial at home with mostly natural products. I have included awesome products, that I mostly use as an alternative if you don’t have time for DIY.
Getting started
Choose the time of day when no one would disturb you for at least 20 mins. Put on your favorite song in the background, pull your hair away and secure it with a headband.
Step 1: Cleanse your skin
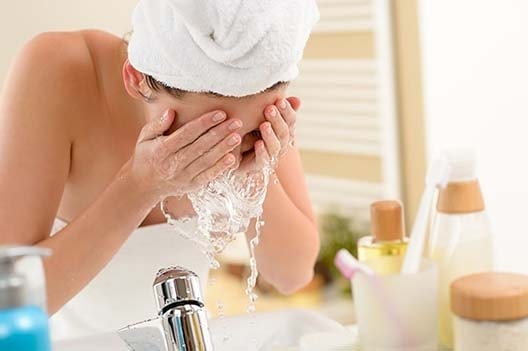
First and probably the most important step is cleaning your skin. Cleansing skin has multiple benefits, removes dirt, oil, and makeup from the skin, as well as refreshing you. Consider this as the setting step for your facial.
If you don’t clean your face, all the dirt would still be stuck on your face. When you scrub, moisturize or perform any of the following steps, that dirt and oil would also be mixed along with other treatments. This would cause more harm than benefit as the dirt and pollutants would get absorbed even more in your skin. So, always, always start with a clean face.
Which products to use for cleansing your skin?
As part of natural, at-home facial, you can either cleanse your face with a natural cleanser or use a gentle, store-bought face wash.
Natural/DIY face cleanser:
1. Oil Cleansing: this is my favorite method of cleaning face naturally.
Take few drops of olive, sunflower, sesame oil and rub in circular motions on your face. Then wipe it off with a hot microfiber towel. Your skin will be super clean.
2. Raw Honey
Wet your face with warm water to open pores. Spread raw honey and massage in circular motions. Once done, wash off with water and wipe with a towel to remove excess honey.
Related: 5 different ways to wash face without soap
Quick Tip
Don’t have time or ingredients to make your own cleanser? You can use a gentle cleanser to wipe your face clean. I have had a good experience with this face wash. You can also use micellar water to get a clean face.
Step 2: Exfoliate
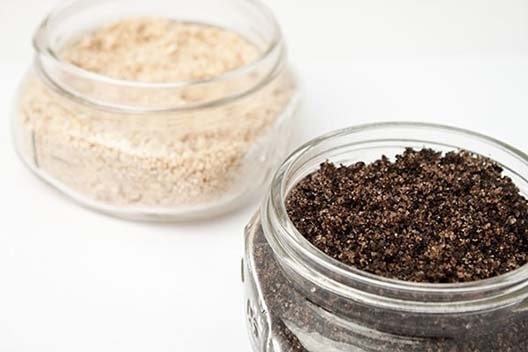
Now that your face is clean, let’s exfoliate it. Exfoliation removes the dead skin cells and build-up from the skin pores. This opens up the clogged pores and allows all the nutrients from facial reach the skin.
Take a pea-sized amount of scrub and massage your face and neck with gentle circular motions. Focus on T-zone and nose to loosen up any clogged pores on the nose.
Natural/DIY scrub:
There are a plethora of scrub options in your kitchen, from sugar, salt to ground coffee, baking soda, and oats.
1.Baking Soda
Plain baking soda is one of the simplest scrubs you can use. Just mix 1 TBSP of baking soda with enough water to make a thick paste and use it to exfoliate.
2. Sugar honey scrub
1 TBSP white or brown sugar
1 tBSP honey
1/2 tsp olive oil
Mix all the ingredients in a bowl and apply on a clean face paying more attention to the nose and chin area.
Related: 7 DIY scrubs for acne-prone skin
Quick Tip
Even though it is difficult to beat plain baking soda scrub in terms of time and efficiency, if you still want something simpler, you can use one of a store-bought scrubs. I suggest using gentle scrub and one which suits your skin type.
Step 3: Steam it up

The next step is to steam the skin. It helps to open the pores and absorb the products in further steps. Steam is also helpful for oily/acne-prone skin as it helps to open the pores and remove debris.
How to do it:
Boil water in a pot. Turn it off and remove it from the stove. Lean over it to absorb the steam. Put a towel over your head for a make-shift tent, covering face and pot in it. This ensures the steam is absorbed by your face. Remove towel and come up for air as and when needed. You can add more oomph factor by adding in a few drops of essential oil, green tea, tulsi leaves. All of these are beneficial to the skin and will make your experience more salonlike.
Quick Tip:
Don’t have a lot of time to spend on this step? Dip a microfiber cloth in hot water, wring it to remove excess water and put it over your face. Let it sit on your face for a couple of minutes then remove it, gently swiping to remove any products from the skin.
For this use hot water, up to what you can comfortably tolerate. The intent is to apply hot steam from a towel to your face without causing any discomfort.
Step 4: Throw away blackheads
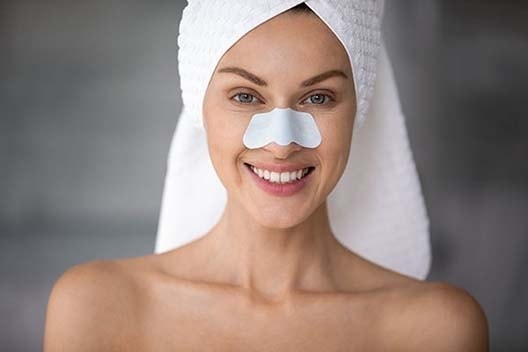
This is more of an advanced step, do it only if you have experience in handling extractors. Else move on to the next step.
The steam in the previous step helped to open up the pores. This makes it easy to extract blackheads and whiteheads from your face. Use the proper tools to remove the blackheads. Be gentle on your skin and don’t be too hard, otherwise, you may hurt your skin. Focus on the nose and chin area to remove any blackheads and wipe them away.
Step 5: Massage it well
The previous steps have all opened up the pores, removed dead skin cells and grime from it. Now is the time to give some pampering to the skin. Take some cream in your hands and massage it in your face focusing on any area that feels dry or sore.
How to do it: Turn on your favorite TV series and spend some time massaging your face with your favorite face cream.
Natural/DIY massage cream:
1.Malai (fresh milk cream) moisturizing cream
Mix fresh malai with a pinch of turmeric and olive oil and massage it well on your face.
Quick Tip
Use your favorite massage cream or any heavy cream for this step.
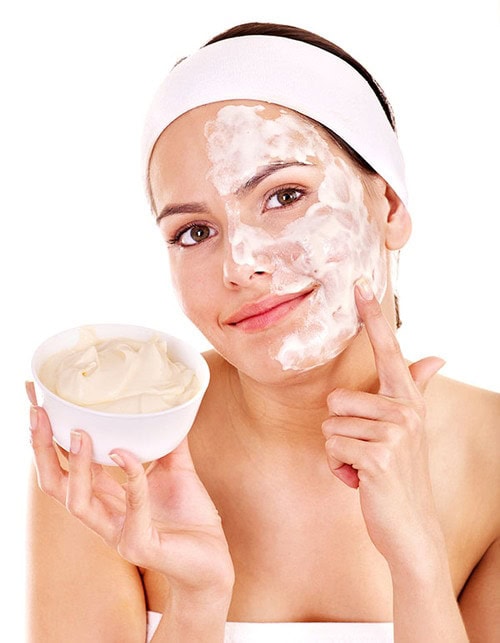
Step6: Face Mask
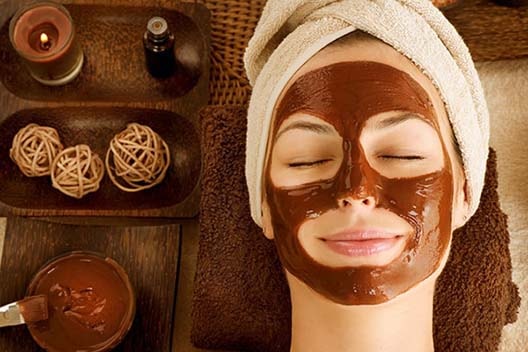
All the above steps have opened the pores and removed the grime from the pores. Follow it up with a good mask to close the pores and add that glow to your skin. You can either use a fresh and natural face mask or any store-bought one. Leave for 15 minutes or till the mask is dry then wash it with cold water.
Natural/DIY face masks:
As we are trying for a natural facial, ditch the chemicals with these natural face masks.
1.Hydrating face mask with banana and oats
1/2 cup ground oats
1 small ripe banana
1 TBSP honey
1 TBSP cocoa powder
Rosewater as needed
Blend all the ingredients in a blender to make a hydrating make for dry skin. Leave out the banana for oily skin as oats are good in absorbing excess oil from the skin.
2. Mud face mask
Use this clay face mask if you don’t like heavy moisturizing masks.
1 TBSP Multani mitti
1 TBSP honey
Rosewater as needed
Mix all the ingredients in a bowl to make a glowing face pack. You can use milk instead of rosewater.
Quick Tip:
Short on time? Use a good store-bought face mask like this to get an instant glow.
Step 7: Toning
Toner is an equally important step in any skincare routine. After washing your face mask, pat your face dry and follow up with a good alcohol-free toner.
Natural/DIY alcohol-free toners:
1.Exotic sandalwood toner
1 TBSP sandalwood hydrosol
1 tsp aloe vera gel
2 drops lavender essential oil
Mix all the ingredients to make an exotic toner. Use a cotton ball to dab it on the face and feel refreshed.
2. Apple cider vinegar toner
Apple cider vinegar is loaded with super nutrients for your skin.
Mix 1 TBSP of apple cider vinegar with a few drops of lavender or tea-tree essential oil.
Quick Tip
Use plain rose water or cooled green tea for quick toning.
Related: 7 DIY toners for acne-prone skin
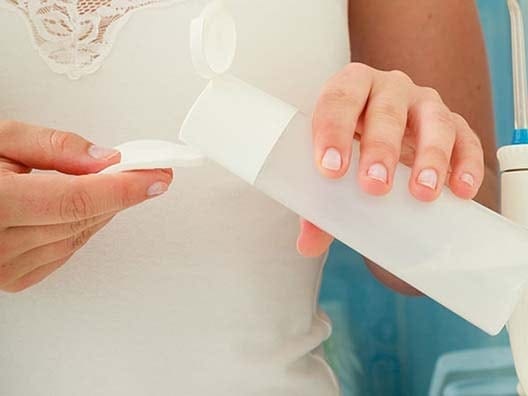
Step 8: Moisturize
Finish your home facial with a good moisturizer. Depending on the time of the day, you can either finish it with a good, moisturizing sunscreen or a repairing night cream.
So, this was your step-by-step tutorial on how to do a natural facial at home. I have tried to give an alternative for both natural as well as store-bought products.
Enjoy glowing skin with this natural facial in the ease of your home!

Leave a Reply